Project/ Embankment
Main applications
- In the floodplain, if the embankment data is not reflected as elevation, it is set as an embankment.
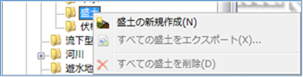 Figure: Embankment
Table: Embankment context menu items and functions
| Context menu items | function |
|---|---|
| Create a new embankment | Create a new embankment. |
| Import embankments | Import embankment data in KML and KMZ format. |
| Export all embankments | Export the fill data in KMZ format. |
| Remove all embankments | Remove all embankments. |
Create a new embankment
-
Specify the initial value of the fill height with the property [Initial embankment height (m)] .
The initial value will be 5m.
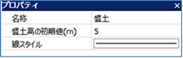
Figure: Fill folder properties screen -
Specify the section on the map where you want to create an embankment with a mouse click.
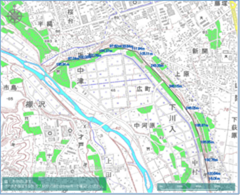
Figure: Creating a new embankment (section designation) -
To revert to the previous state, right-click or[BackSpace] press the key.
-
To cancel the creation,[Esc] press the key.
-
Confirm with double click or enter.
-
Set the conditions related to the embankment on the Properties screen.
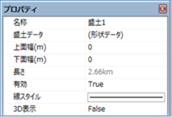
Figure: Properties screen for creating a new embankmentTable: New fill property names and settings
Property Name What to set name Enter a name of your choice. Embankment data On the embankment data editing screen, set the top elevation and embankment height of the selected location on the map. Top surface width (m) Sets the top width of the embankment.
The default value is "0".Bottom surface width (m) Sets the bottom width of the embankment.
The default value is "1".length Displays the length of the embankment specified on the map. valid Enable/disable settings.
The initial value is True.
True: Enabled:
False: DisabledLine Style Specify the line style (line type/line width/line color) to be displayed on the map.
The initial values are as follows:
Linetype: Solid
Line Width: 2px
Line Color: RGB (80,80,0)3D display Enable/disable 3D display of embankment data.
The initial value is False.
True: 3D display.
False: Do not display 3D.
Import embankments
-
Specify the initial value of the fill height with the property [Initial embankment height (m)] .
The initial value will be 5m.
-
When you select a menu, an open dialog appears.
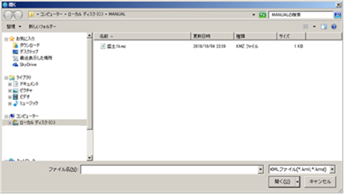
Figure: Importing an embankment. -
Specify the KML file to import [open] and click the button to import the embankment data.
LineStringelement as an embankment.
The following KML file import results are shown in the screenshot below: After importing KML.
1 2 3 4 5 6 7 8 9 10 11 12 13 14 15 16 17 18 19 20 21 22 23 | |
KML elements to import
KML ingestion coordinates reflects the longitude and latitude of .
LookAt Elevation values for , LineStyle, and are coordinatesignored.
If you want to import embankment tops data, please refer to FAQs/ PowerShell script to import embankment data into DioVISTA.
Export all embankments
-
When you select a menu,[Save As] a dialog appears.
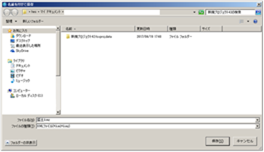
Figure: Export all embankments. -
If you specify an arbitrary output destination [preservation] and click the button, the embankment data will be output in KMZ format.
Remove all embankments
When you select the menu, a confirmation message appears. [Yes] Click the button to delete all fill data.