Condition setting Individual operation/ Downflow type flood / river
Create a new river (common to downstream flooded rivers and rivers)
Refer to Creating a new flowing flood river/river.
Set the left bank line, right bank line, and river center line (common to downstream-type flooded rivers and rivers)
-
Select the river for which you want to specify the left bank line, right bank line, or river center line from > or in the project menu list of DioVISTA [Simulation conditions] [rivers] and [Flowing flood rivers] right-click.
-
For the Left Bank Line [Left Bank Line] > [Definition of the Left Bank Line]
For Right Bank Line [Right Bank Line] > [Definition of the Right Bank Line]
For Kawashin Line [Kawashin Line] > [Definition of the river line]
Click.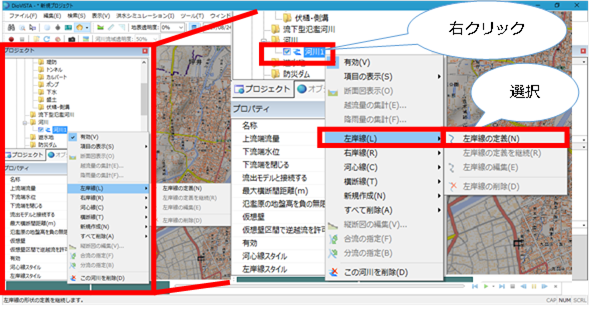
-
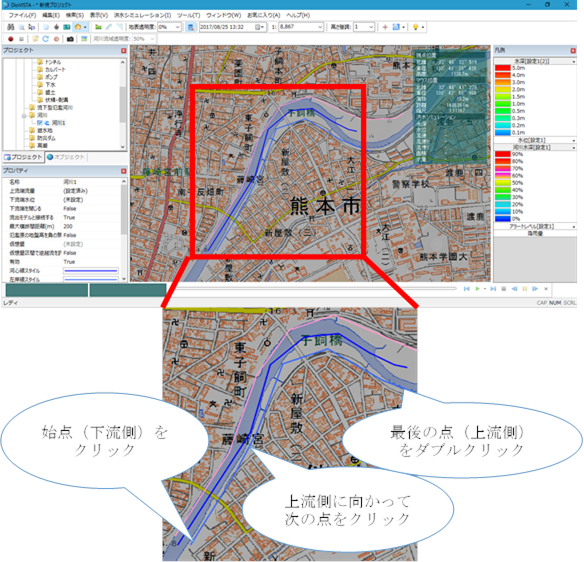
Start from the downstream side and click upstream to create the left bank line, right bank line, and river core line.
- Specify the range with a line.
- To revert to the previous state, right-click or[BackSpace] press the key.
- To cancel the creation,[Esc] press the key.
-
At the last point, double-click or press Enter to confirm.
Set a transverse line (common to downstream-type flooded rivers and rivers)
-
Conditions: The river must have a left/right bank line set in advance.
-
In order to perform a simulation, it is necessary to set at least two transverse lines per river.
-
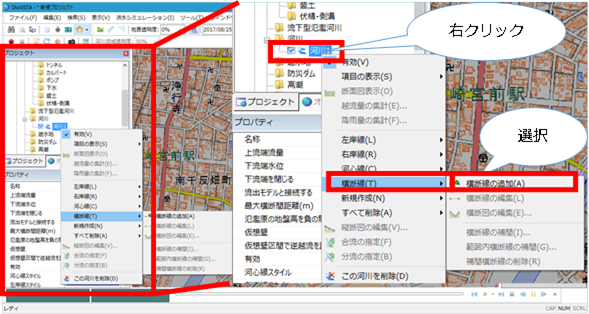
Select the river for which you want to specify a transverse line from > in the project menu list of DioVISTA [Simulation conditions] [rivers] and right-click.
-
[Transverse lines] Click > [Add a cross line] .
-
Specify the start and end points of the crossing line on the map with a mouse click so that it intersects the right bank line and the left bank line on the map.
- To revert to the previous state, right-click or[BackSpace] press the key.
- To cancel the creation,[Esc] press the key.
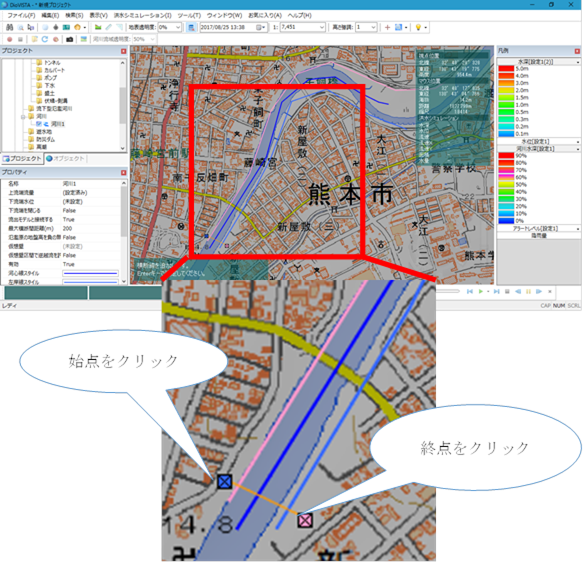
-
[Enter] Press the key to confirm creation.
-
[Cross-sectional view editing] A dialog will appear.
-
 [Terrain acquisition] icon to get terrain data and create a section.
 -
 [choice] to enter selection mode and edit vertices.
 -
When you're done editing,
 [decision] select to save your edits.
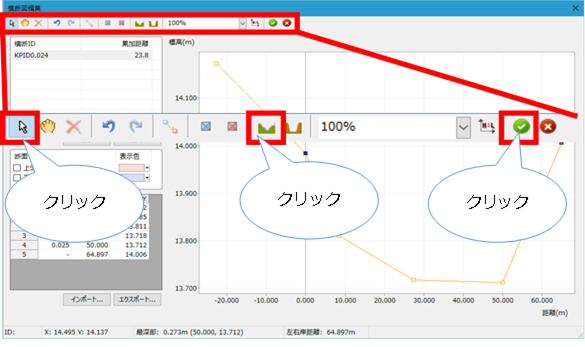
Capture river data (common to downstreamed flooded rivers and rivers)
-
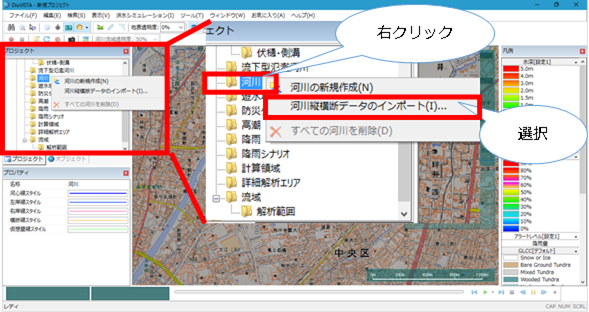
Right-click > [Simulation conditions]from the DioVISTA project menu list [rivers] .
-
[Import river cross-section data] Click.
-
The Select Folder dialog appears.
-
Specify the folder where the file is stored [Select Folder] and click the button.
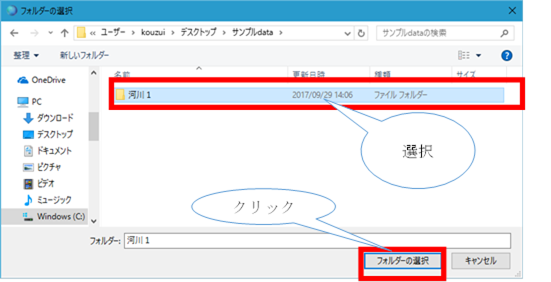
-
The selected stream data is populated.
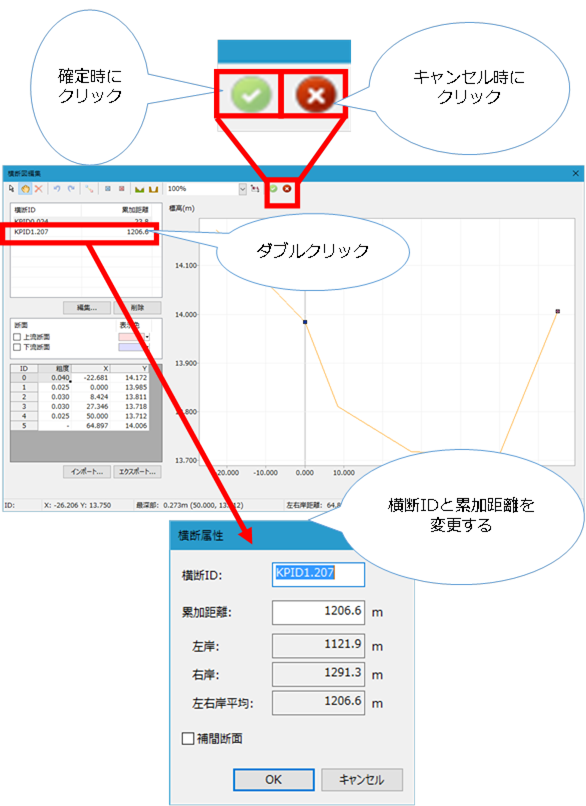
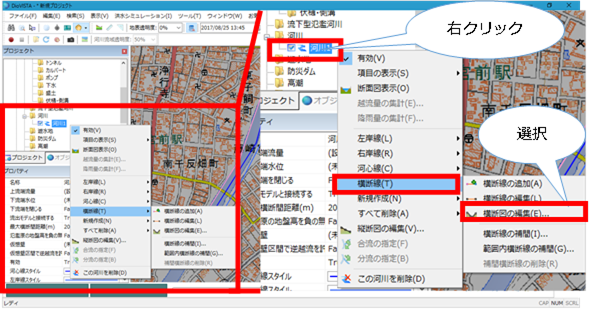
Check and edit cross-sectional maps (common to downstream-type flooded rivers and rivers)
-
Select the river you want to check or edit the crossing line from > in the project menu list of DioVISTA [Simulation conditions] and [rivers] right-click.
-
[Transverse lines] Click > [Edit a cross-section] .

-
[Cross-sectional view editing] A dialog will appear.
-
Select the section you want to review/edit.
- You can enter the roughness factor directly.
- Double-click the edit line to display the section attribute screen, where you can change the section ID and cumulative distance.
-
If you want to accept your edits and exit,
 [decision] select and save your edits.
 - If you want to cancel editing,
 please select [cancel] the icon or [Esc] key. If you have made changes, a save confirmation message appears. If you do not want to save [no] , select .
- If you want to cancel editing,
Change the position of the right and left bank shoulders (common to flowing flooded rivers and rivers)
-
Select the river whose crossing line you want to edit from > in the project menu list of DioVISTA [Simulation conditions] [rivers] and right-click.
-
[Transverse lines] Click > [Edit a cross-section] .
-
[Cross-sectional view editing] A dialog will appear.
-
 [choice] to switch to selection mode.
 -
Select the vertex that you want to be the left bank shoulder.
-
 [Left bank shoulder button] Select
 -
Select the vertex that you want to be the right bank shoulder.
-
 [Right bank shoulder button] Select
 -
When you're done editing,
[decision] select to save your edits. 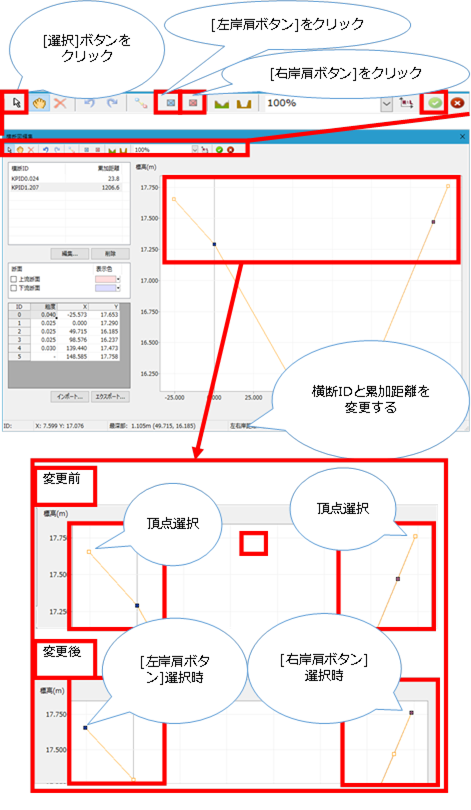
Change the cross-sectional shape (common to flowing flooded rivers and rivers)
-
Select the river whose crossing line you want to edit from > in the project menu list of DioVISTA [Simulation conditions] [rivers] and right-click.
-
[Transverse lines] Click > [Edit a cross-section] .

-
[Cross-sectional view editing] A dialog will appear.
-
[choice] to switch to selection mode.
-
Grab the vertex you want to change and move it.
* [shift] Parallel or vertical movement is possible with the key selected.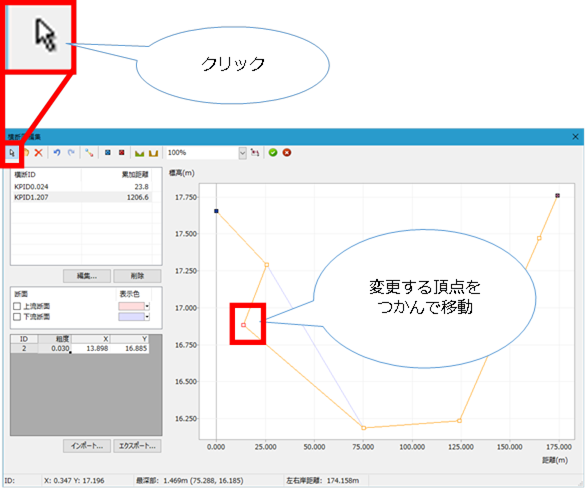
Offset movement of the cross-sectional shape (common to flowing flooded rivers and rivers)
-
Select the river whose crossing line you want to edit from > in the project menu list of DioVISTA [Simulation conditions] [rivers] and right-click.
-
[Transverse lines] Click > [Edit a cross-section] .

-
[Cross-sectional view editing] A dialog will appear.
-
 [choice] to switch to selection mode.
 -
Select the vertex you want to move.
-
 [Offset Move] Select
 -
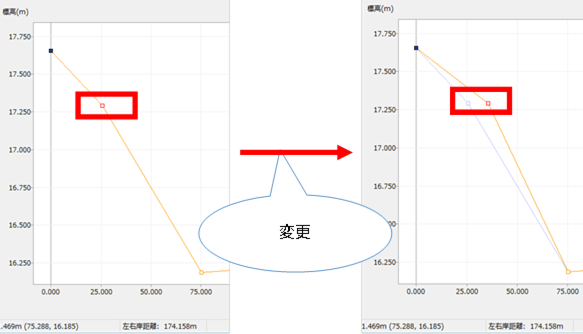
Enter the value you want to move and [OK] select the button.
-
When you're done editing,
[decision] select to save your edits. 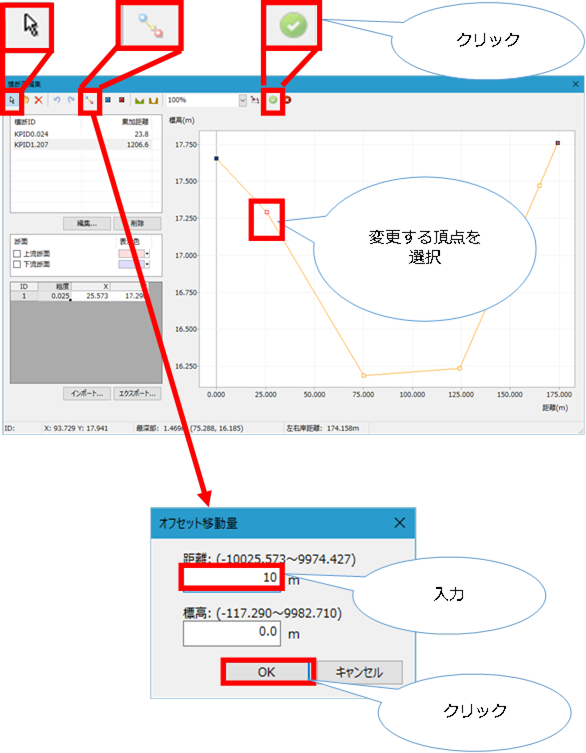
Import of cross-sectional shapes (common to flowing flooded rivers and rivers)
-
Select the river whose crossing line you want to edit from > in the project menu list of DioVISTA [Simulation conditions] [rivers] and right-click.
-
[Transverse lines] Click > [Edit a cross-section] .

-
[Cross-sectional view editing] A dialog will appear.
-
[import] When you select the button, the message "Do you want to discard the current settings?" appears.
-
[Yes] Select
-
An open dialog appears, selecting the data you want to import.
-
[open] Select

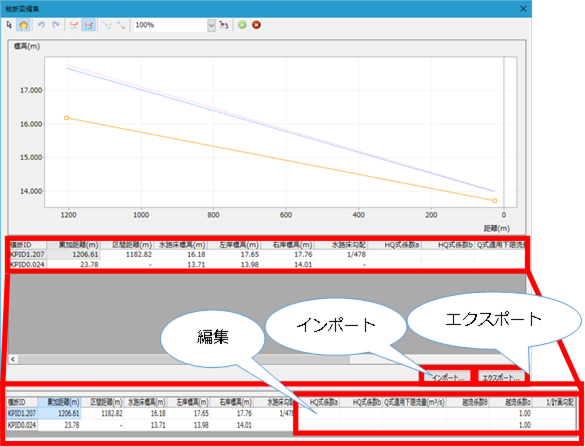
Check and edit longitudinal maps (common to flowing flooded rivers and rivers)
-
Select the river you want to check or edit the profile map from > in the project menu list of DioVISTA [Simulation conditions] and [rivers] right-click.
-
[Edit profile drawings] Click.
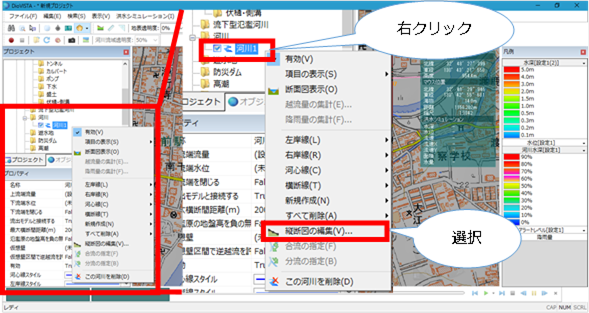
- The HQ equation, overflow coefficient and planned slope can be entered directly.
- You can export, edit, and import CSVs.
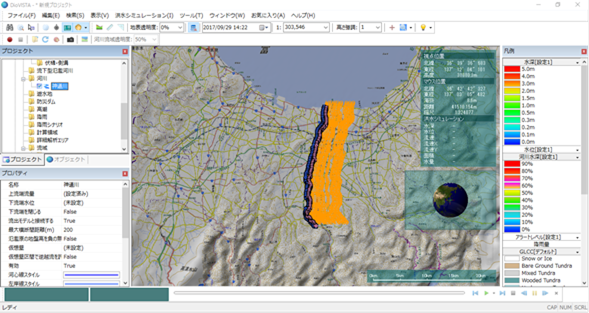
Display a cross-sectional view of the river (common to flowing flooded rivers and rivers)
-
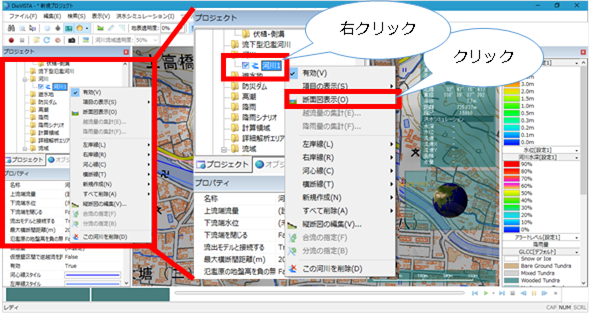
Select the river you want to display cross-sectional view from the rivers in > of the DioVISTA project menu list [Simulation conditions] [rivers] and right-click.
-
[Cross-sectional view display] Click.
-
A cross-sectional view appears.

Aggregate the flow rate of rivers (common to downstream flooded rivers and rivers)
-
Conditions: The simulation results using the river for which you want to aggregate the overflow flow rate must be displayed. (Reference: Simulation/Execution)
-
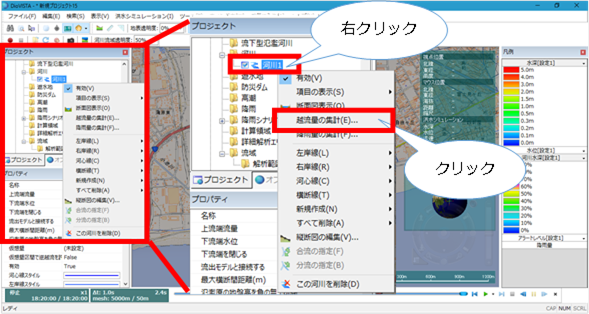
Select the river whose overflow flow you want to aggregate from > in the project menu list of DioVISTA [Simulation conditions] [rivers] and right-click.
-
[Aggregation of overflow flow] Click.
-
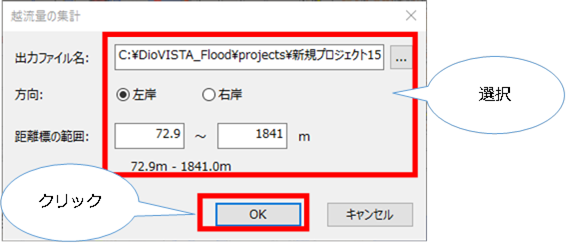
[Aggregation of overflow flow] A dialog will appear.
-
Select the output file name, direction, and distance marker range.
-
When you are finished making your selections [OK] , click .
Aggregate the amount of rainfall in rivers (common to downstream-type flooded rivers and rivers)
Condition 1: Rainfall scenarios must have been imported. (Reference: Condition setting Individual operation / rainfall scenario)
Condition 2: Watershed analysis of rainfall scenario data properties must be set to True.
*Condition 3: Rainfall scenarios and simulation results using the rivers for which rainfall amount you want to aggregate must be displayed. (Reference: Simulation/Execution)
-
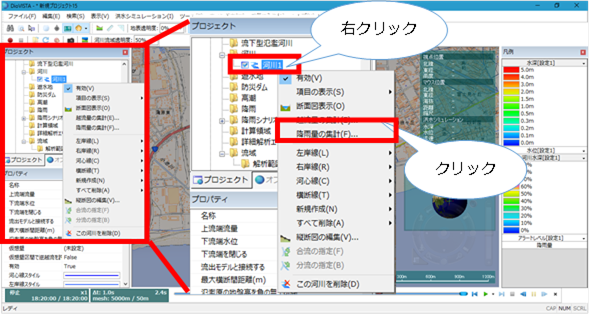
Select the river whose rainfall you want to aggregate [Simulation conditions] from > [rivers] in the DioVISTA project menu list and right-click.
-
[Rainfall aggregation] Click.
-
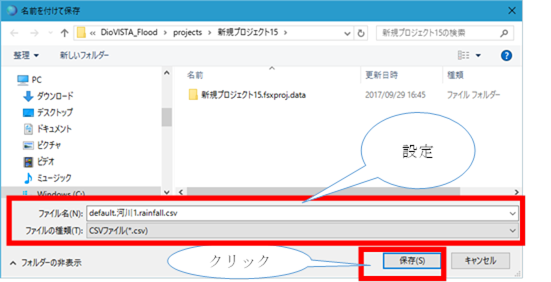
[Save As] A dialog will appear.
-
Set the file name and file type.
-
When you are finished [preservation] , click .
Designate the confluence of rivers (common to downstream flooded rivers and rivers)
-
Conditions: It is necessary to set a river that will be a tributary or main stream.
-
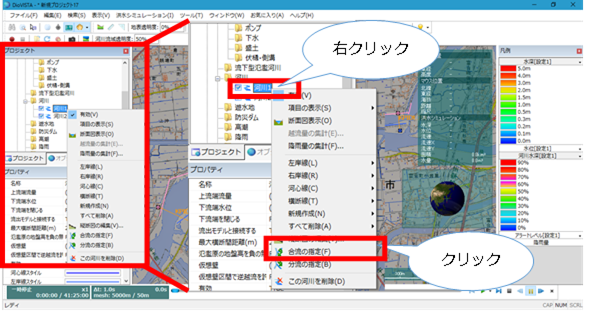
Select the river that will be the main line from the rivers in > [Simulation conditions]of the project menu list of DioVISTA [rivers] and right-click.
-
[Specifying a confluence] Click.
-
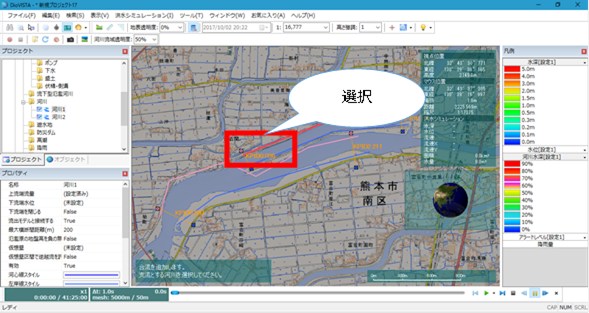
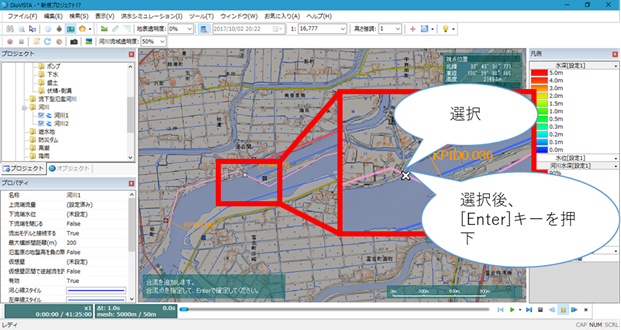
Select the right-left bank line of the tributary river.
- If you want to merge with the left bank of the main stream, select the left bank line of the tributary.
- If you want to merge with the right bank of the main stream, select the right bank line of the tributary.
-
Specify the confluence point and [Enter] press the key.
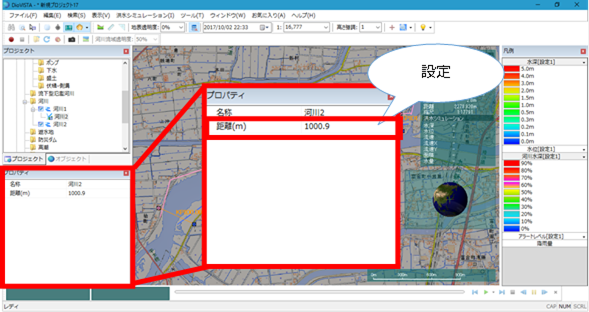
-
Sets the distance of the confluence.
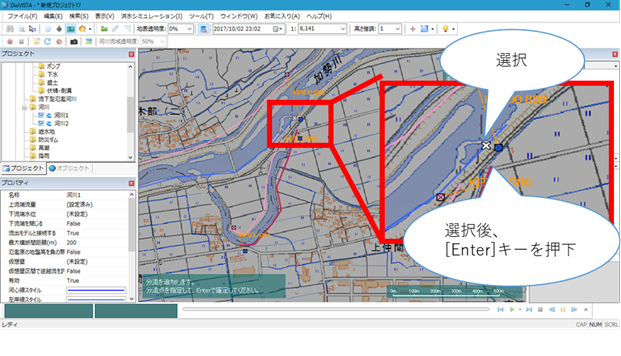
Designate river diversion (common to downflowing flooded rivers and rivers)
-
Conditions: It is necessary to set a river that will be a tributary or main river.
-
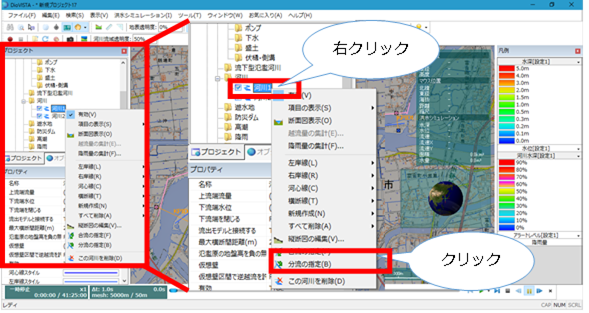
Select the river that will be the main river from the rivers in > [Simulation conditions] of the project menu list of DioVISTA [rivers] and right-click.
-
[Specifying a Diversion] Click.
-
Select the right-left bank line of the river that will be the tributary that you want to divert.
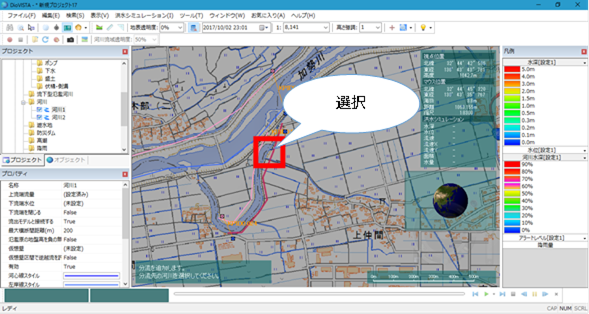
-
Specify the diversion point and [Enter] press the key.
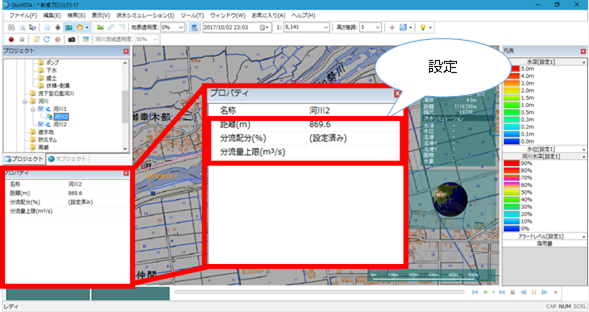
-
Set the confluence distance, diversion distribution, and upper flow divide.
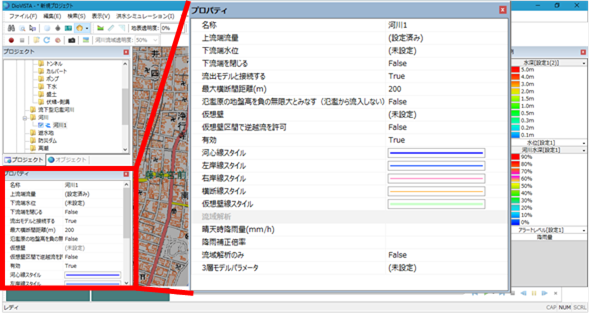
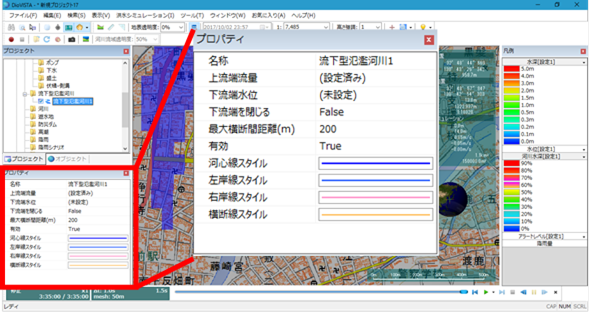
Make detailed settings for downflowing flooded rivers (for downflowing flooded rivers only)
-
Please make various settings in Properties.
Configure advanced settings for rivers (rivers only)
-
Please make various settings in Properties.