Condition setting Individual operation/ River/ Water level gauge
Create a water level gauge
-
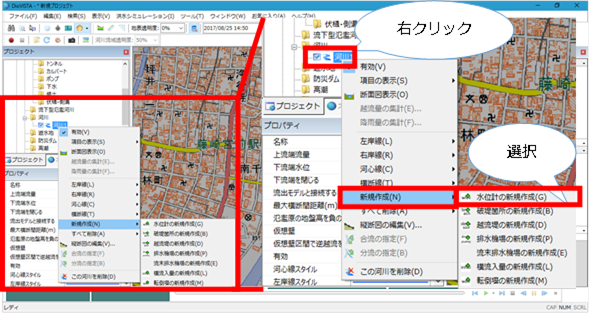
Select the river for which you want to specify a water level gauge from > in the DioVISTA project menu list [Simulation conditions] [rivers] and right-click.
-
[Create new] Click > [Create a new water level gauge] .
-
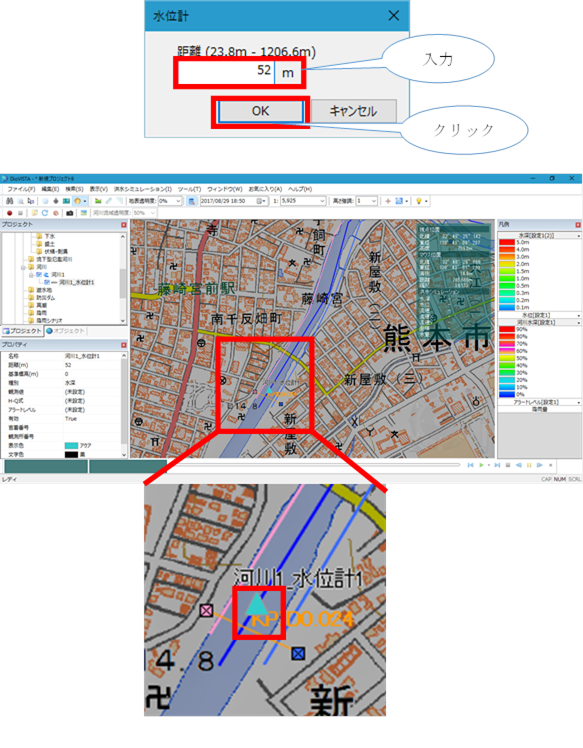
[Water level gauge] A dialog will appear.
-
Enter the distance from which you want to create the water level gauge.
-
[OK] button. A water level gauge is created at the specified location.
-
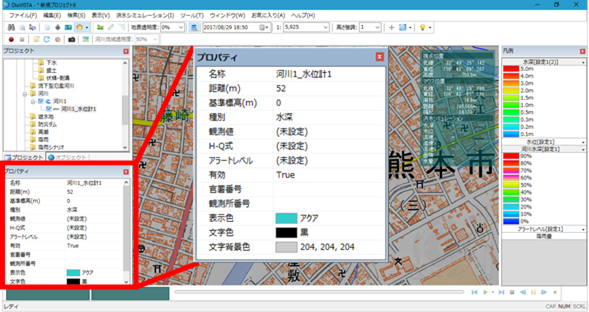
Set the settings related to the water level gauge on the properties screen.
Set the observed values (water depth and level) of the water level gauge
-
Select the water level gauge for which you want to set the observation value (water depth / water level) from > in the project menu list of DioVISTA [Simulation conditions] and [rivers] click it.
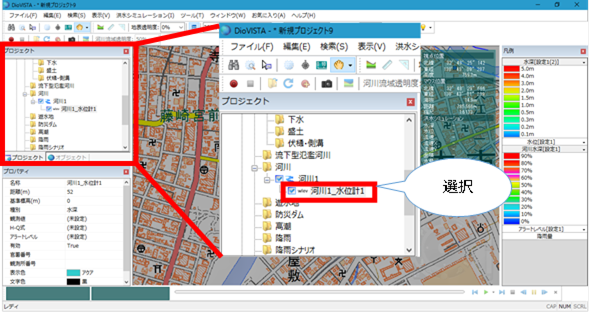
-
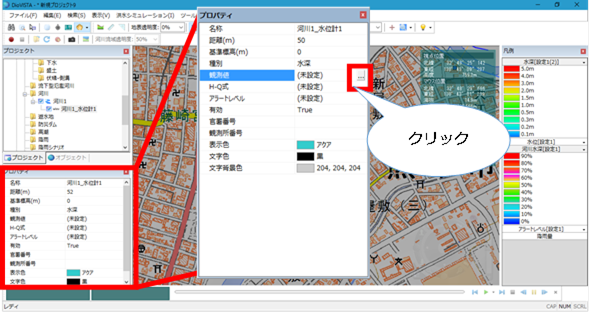
Click under Property Observations [...] .
-
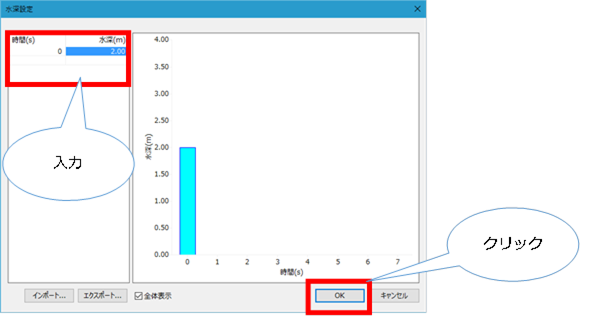
If the property type is water depth, the water depth setting screen is displayed.
- If the type of property is water level, the water level setting screen is displayed.
-
If the property type is water depth, enter the time (s) and depth (m).
- If the property type is water level, enter the time (s) and water level (m).
-
When you are finished [OK] , click .
Set the H-Q formula for the water level gauge
-
Select the water level gauge for which you want to set the H-Q formula from > in the project menu list of DioVISTA [Simulation conditions] [rivers] and click it.
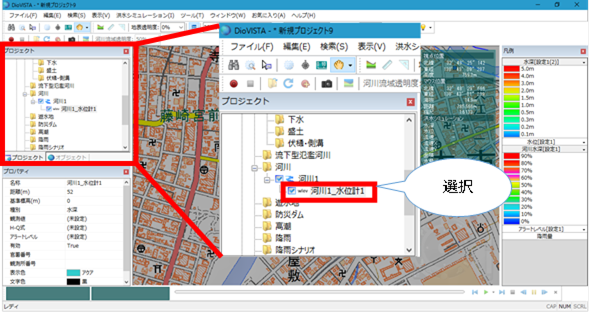
-
Click in the H-Q expression of Properties [...] .
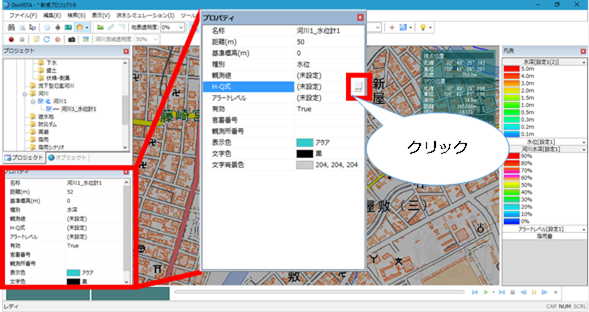
-
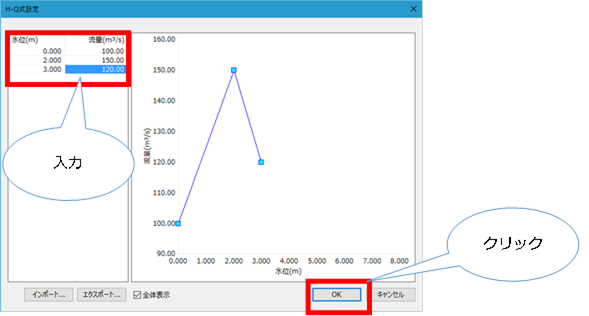
The H-Q setting screen appears.
-
Enter the water level (m) and flow rate (m^3/s).
-
When you are finished [OK] , click .
Set the alert level for the water level gauge
-
Select the water level gauge for which you want to set the alert level from > in the project menu list of DioVISTA [Simulation conditions] and [rivers] click it.

-
Click under Alert Level in Properties [...] .
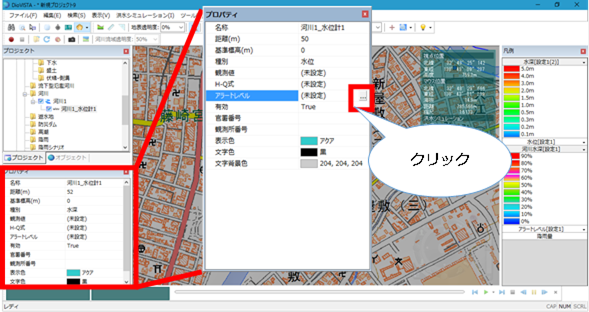
-
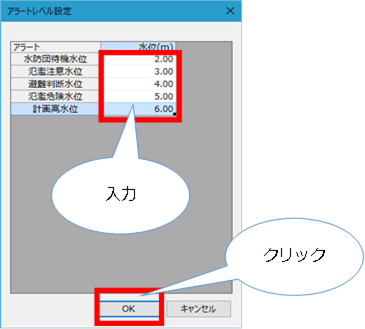
The alert level setting screen appears.
-
Enter each water level (m).
-
When you are finished [OK] , click .
