Condition setting Common operation/ Create new
Create new water column collapse / Reservoir / Disaster prevention dam / Storm surge / Rainfall / Detailed analysis area / Analysis range
-
The folder of the simulation condition you want to create is in the project menu list of DioVISTA. [Simulation conditions] and right-click.
-
[Create a new simulation] Click.
* Simulations contain each simulation name.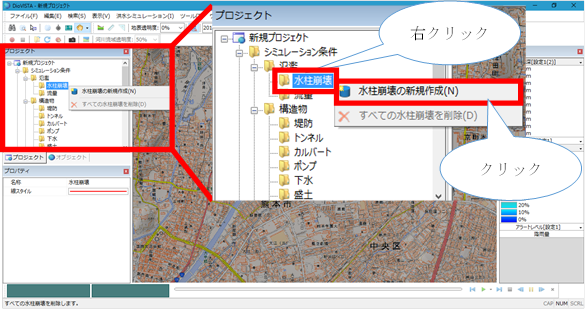
-
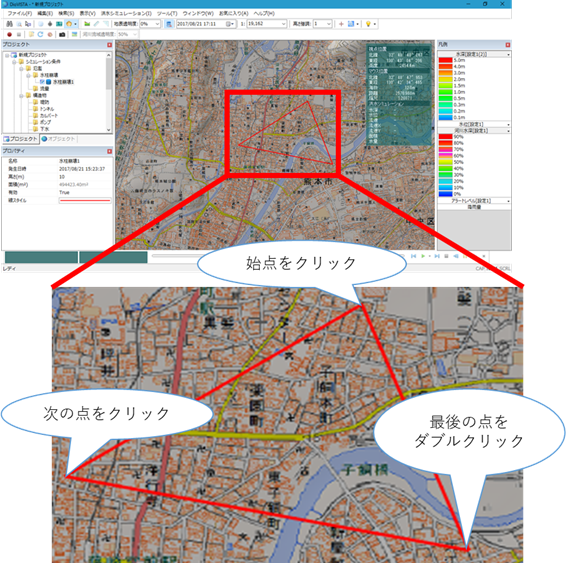
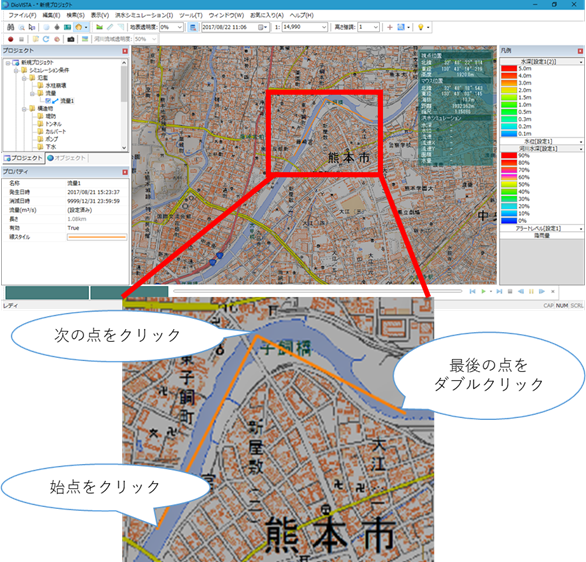
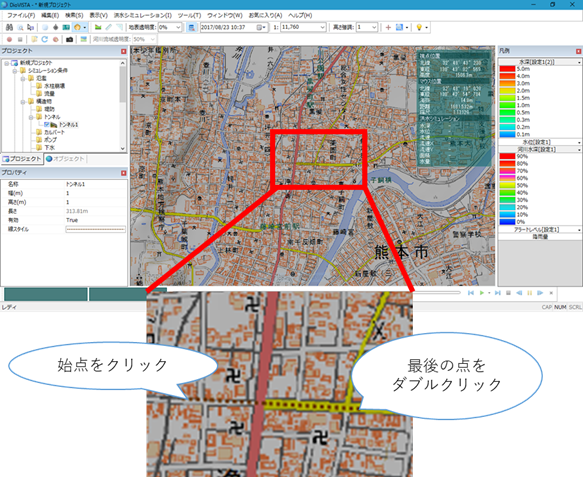
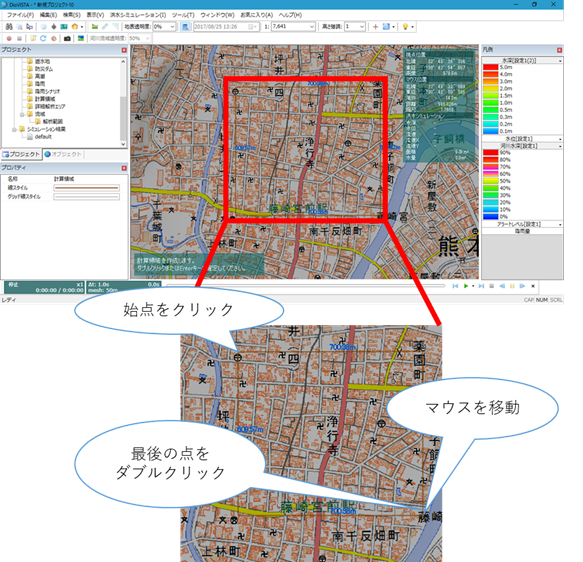
Specify the starting point on the map with a mouse click.
-
Specify the following points with a mouse click:
- Specify the range with a line.
- To revert to the previous state, right-click or[BackSpace] press the key.
- To cancel the creation,[Esc] press the key.
-
At the last point, double-click or press Enter to confirm.
-
The start and end points are connected by a line and the extent is specified.
-
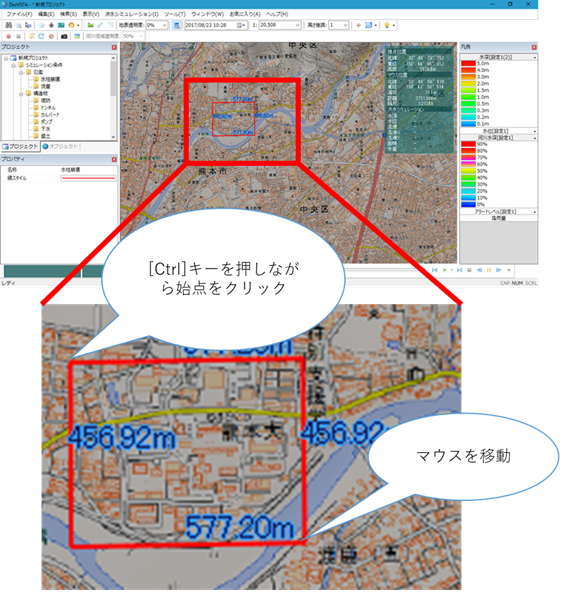
[Ctrl] If you hold down the key, click the start point, and move the mouse, you can specify the range with a rectangle.
-
-
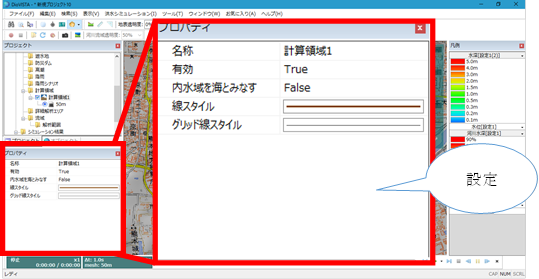
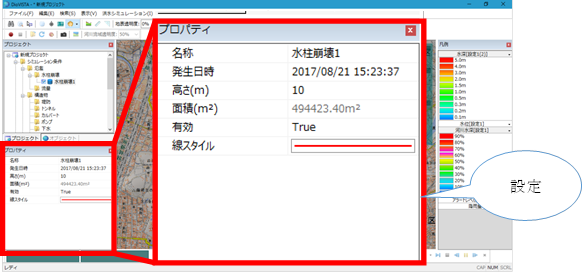
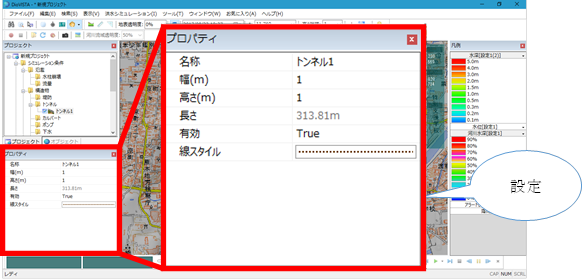
Set the conditions related to the newly created simulation condition on the Properties screen.
Create new flow / embankment / sewage / embankment / gutter / gutter
-
Select the folder of the simulation condition you want to create from in the DioVISTA project menu list and [Simulation conditions] right-click.
-
[Create a new simulation] Click.
* Simulations contain each simulation name.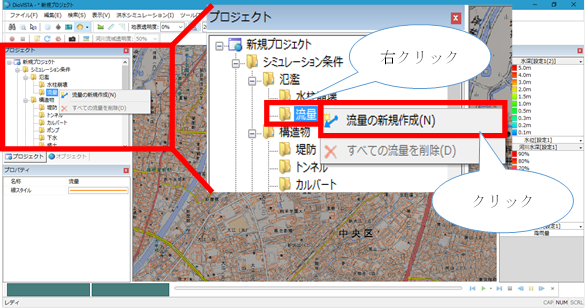
-
Specify the starting point on the map with a mouse click.
-
Specify the following points with a mouse click:
- Specify the range with a line.
- To revert to the previous state, right-click or[BackSpace] press the key.
- To cancel the creation,[Esc] press the key.
-
At the last point, double-click or press Enter to confirm.
-
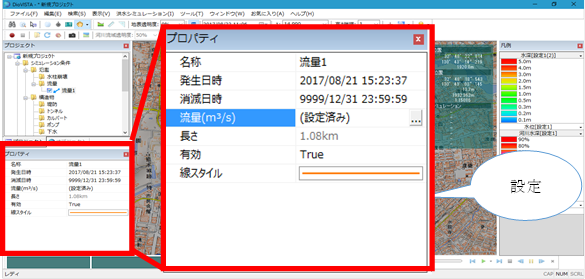
Set the conditions related to the newly created simulation condition on the Properties screen.
Create a new tunnel/culvert
-
Select the folder of the simulation condition you want to create from in the DioVISTA project menu list and [Simulation conditions] right-click.
-
[ Create a new simulation] Click.
* Simulations contains the name of each simulation.
-
Specify the starting point on the map with a mouse click.
-
Specify the end point with a mouse click.
- To revert to the previous state, right-click or[BackSpace] press the key.
- To cancel the creation,[Esc] press the key.
-
Confirm with double click or enter.
-
Set the conditions related to the newly created simulation condition on the Properties screen.
Create a new pump
-
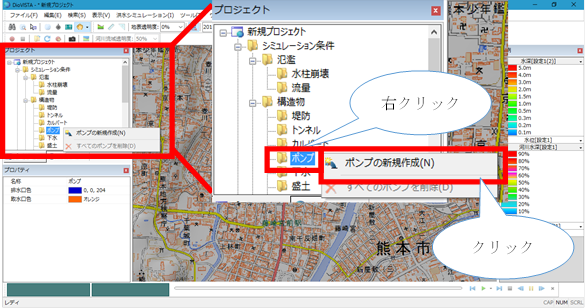
Right-click >[Simulation conditions]> [Structures]from the DioVISTA project menu list [pump] .
-
[Creating a New Pump] Click.
-
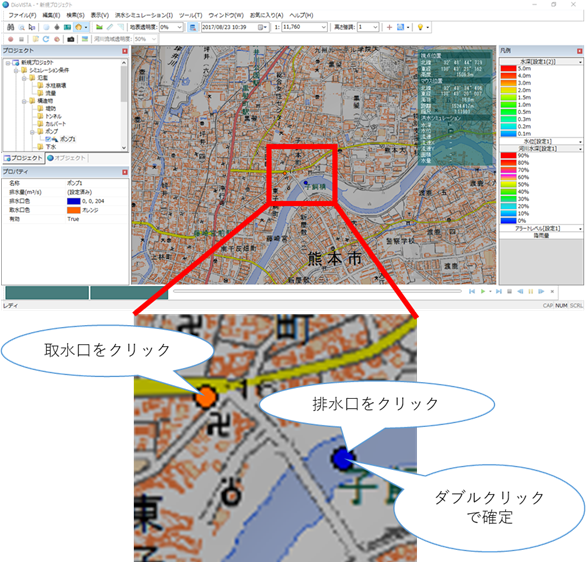
Specify the location of the drain hole on the map with a mouse click.
-
Specify the location of the water intake on the map with a mouse click.
- To revert to the previous state, right-click or[BackSpace] press the key.
- To cancel the creation,[Esc] press the key.
-
Confirm with double click or enter.
-
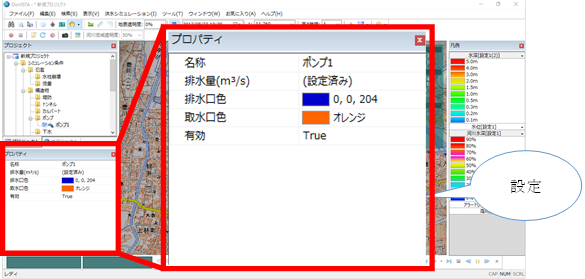
Set the conditions related to the pump on the properties screen.
Create a new flowing flood river/stream
-
Select the folder of the simulation condition you want to create from in the DioVISTA project menu list and [Simulation conditions] right-click.
-
[Create a new simulation] Click.
* Simulations contain each simulation name.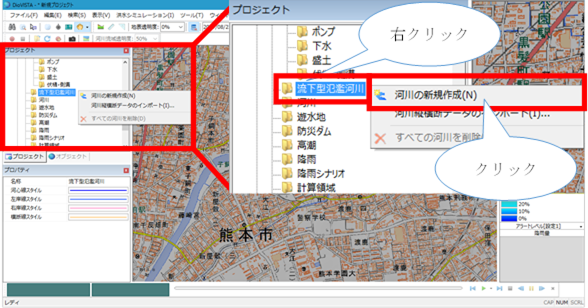
-
The new data is created under the folder.
-
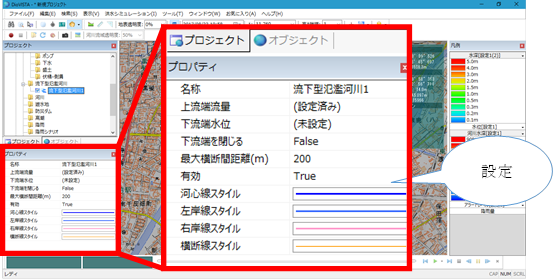
Set the conditions related to the newly created simulation condition on the Properties screen.
Create a new calculation area
-
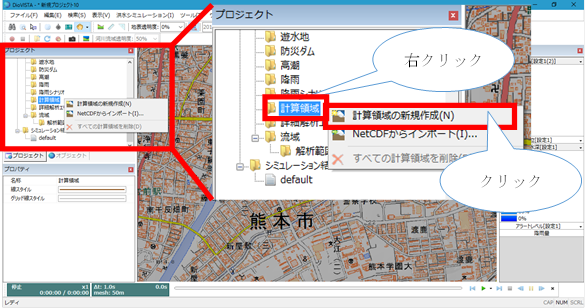
Select the folder of the calculation area you want to create from the DioVISTA project menu list [Simulation conditions] and right-click.
-
[Creating a New Compute Area] Click.
-
Specify the area on the map where you want to create the calculation area with a rectangle with a mouse click.
- To revert to the previous state, right-click or[BackSpace] press the key.
- To cancel the creation,[Esc] press the key.
-
Confirm with double click or enter.
-
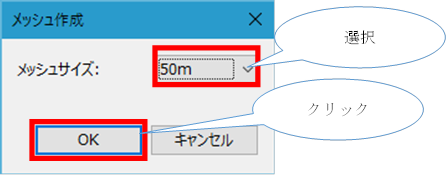
[Meshing] A dialog will appear.
-
Select the mesh size of the calculation area and[OK] click .
-
Set the conditions related to the calculation area on the property screen.