Project/ Calculation Area/ Topography, roughness, porosity, transmittance X, transmittance Y, land use
- Each mesh has the same operation, so let's take terrain as an example.
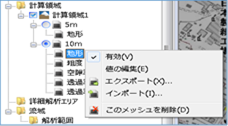 Figure: Topography, roughness, porosity, transmittance X, transmittance Y, land use
Table: Context menu items and functions of topography, roughness, porosity, transmittance X, transmittance Y, and land use
| Context menu items | function |
|---|---|
| valid | Enable/disable settings. The initial value is True. True: Enabled: False: Disabled |
| Editing Values | Select a range and edit the values in tabular format. |
| export | Export the mesh values as a CSV or ASCII file. |
| import | Ingest mesh values from a CSV or ASCII file. |
| Delete this mesh | Deletes the selected mesh. |
valid
Enable/Disable. If enabled, a check is displayed.
Editing Values
-
Select the part of the calculation area where you want to edit the mesh values.
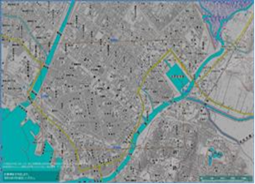
Figure: Selecting the part of the mesh where you want to edit values -
The values in the selected range are read and displayed in a tabular format.

Figure: Displaying the values of a selected range in a tabular formatTable: Top left icon items and functions in tabular view
icon function 
Enable/disable positional linkage.
When enabled, the viewpoint on the GIS is moved so that the selected point in the table is the center of the viewpoint.
The initial value is True.
True: Enabled:
False: Disabled
Sets the visibility of grid lines for the mesh.
The initial value is True.
True: Enabled:
False: Disabled
Show/hide 3D mesh lines of terrain.
The default value is False (disabled).
True: Enabled:
False: Disabled
-
Select the part where you want to edit the value and edit the number.
For terrain, you can make the following special settings:
- If not on land: "Sea"
- Infinitely deep: "Open"
- Infinitely high: "Close"
For land use (MLIT), please set it as follows.
Table: Land Use (MLIT) values and fields
value item 1 Forests, wastelands, etc. 2 field 3 Farmland and other farmland 4 Land under development 5 Open space 6 Industrial site 7 General low-rise residential area 8 Densely populated low-rise residential area 9 Medium- and high-rise residential areas 10 Commercial and commercial land 11 Road land 12 Parks, green spaces, etc. 13 Land for public utilities 14 Rivers, lakes, etc. 15 Other sites 16 sea -
To complete editing, click in the upper right corner of the table
 .
.
export
When you select the menu, the file selection dialog appears.
Enter the folder and file name you want to save, and[preservation] click the button.
The mesh data is exported.
-
Exported as an ASCII file in the UTM coordinate system
The mesh size specified for "CELLSIZE" is displayed.
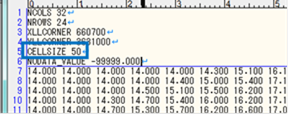
Figure: Exported as an ASCII file in UTM coordinate system. -
When exported as an ASCII file in a latitude-longitude system
DX displays the longitude length value in degrees.
DY displays the latitudinal length value in degrees.
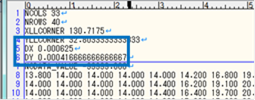
Figure: Latitude-longitude system exported as ASCII file
import
When you select the menu, the file selection dialog appears.
Select the CSV file you want to import and[open] click the button.
The CSV file is imported and overwritten with the mesh values.
- If the mesh sizes do not match, they cannot be imported.
Delete this mesh
When you select the menu, a confirmation message appears. [Yes] Click the button to delete the selected mesh data.
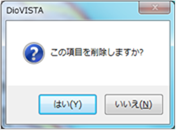 Figure: Delete this mesh